Wednesday, December 24, 2025

 Last minute holiday gift buyers - Gallery 2118 will be open until 6pm tonight. Wonderful gifts of original art starting at $45 up to $2100. Greeting cards are $5. Happy holidays all!

Crystal Corner Snow Storm by Terry Talbot. 20X30 gallery canvas $275. See more of Terry's art at https://www.talbotstudioandgallery.com/terry-talbot

Monday, April 18, 2022

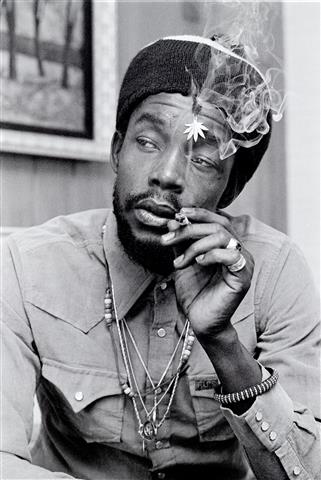
I shot Peter Tosh because he was a vegetarian

In 1979 I got to spend a day hanging out with reggae star Peter Tosh and his band. I was a contract photographer with a local music mag, the Emerald City Chronicle, in Madison Wi. Publisher/editor Michael St. John sent me along on an interview with Tosh with day before his gig at Headliners on Feb 25, 1979.

The writer and I showed up for the interview. Peter Tosh, along with sidemen Sly Dunbar, Robbie Shakespear and Mikey Chung were hanging out in their hotel room. The mood was casual, but Tosh seemed a little edgy. The interview didn't last long. Tosh spoke to us in his native language, Patois, The writer left in disgust. I'd been to Jamaica a few times and could pick up a little of what Tosh was saying, but not much. I grabbed a couple of quick shots and started to leave when I noticed a macrobiotic cookbook on his bed stand. I mentioned I was a macrobiotic vegetarian. Tosh dropped the Patois and spoke very good English as he talked to me about life, god, politics and lifestyle.

                                                                                              Peter Tosh

Tosh sat me down, lit a spliff and began to tell me about Rastafarianism, the liberation theology of Haile Salassie


Winston Hubert McIntosh was born October  19th, 1944 in Westmoreland Jamaica and died in a home invasion on September 11th, 1987 in Kingston. 

God religion man and  law

Peter Tosh along with Bob Marley and Bunny Wailer formed the Wailers in 1967, the first modern reggae band, and enjoyed great success with the release of early albums Catch a Fire in 1973, followed by  Burnin' and Natty Dread.

UNDERSTANDING EXPOSURE: AN INTRODUCTION TO PHOTOGRAPHY


Mastering photography is like playing a musical instrument. Anyone can make noise on a piano, but to really make music, it is important to read music, learn proper fingering, and practice your scales. Learning how to control exposure is a similar discipline. It’s not exactly fun, but if you ever want to get beyond ‘click and hope for the best’ it is absolutely essential.

WHAT IS EXPOSURE?

The fundamentals of a camera are very simple: a box with a door (the shutter) that allows light in to burn an image on a light-sensitive surface. The term ‘exposure’ refers to the amount of light to which the film–or the sensor–is exposed.
The most basic photographic errors come down to allowing in too much light (over-exposure/too bright) or too little (under exposure/too dark).
In the photo above you can see the difference between an under-exposed, a properly exposed, and an overexposed image. "Progression of an HDR" captured by Jim Bauer on Flickr.
In the bottom row of the photo above, you can see the difference between an overexposed, a properly exposed, and an underexposed image. The top two frames are the same image after a little post production.
“Progression of an HDR” by Jim Bauer

A WORD ABOUT LIGHT

Understanding exposure makes one marvel at the human eye’s capacity to adjust to the huge differences in light we experience every day. There is around 1,000 times more light outdoors on a bright sunny day than in an averagely lit room indoors. Our eyes can simultaneously process a sunlit lawn and a log in the deep shade of a tree. Cameras are becoming better at this, but the light ‘latitude’ of a sensor is still nowhere near the capabilities of the human eye. To correctly expose the sunlit lawn (i.e. make it appear as it does to the naked eye), the log would be lost in blackness. Correctly exposing the log would leave the lawn a blaze of white.
Shutter speed, aperture, and ISO are the holy trinity of photography. They work in tandem, and to master them is half the battle of becoming a true photographer.

ISO

Don’t worry about what the acronym stands for (it’s ‘International Organization for Standardization’, if you must know). ISO refers to the ‘speed’ at which film–or a sensor–absorbs light. Outdoors on a bright sunny day you would use ISO 100. This is a ‘slow’ ISO but since there is so much light it can absorb it very easily. A ‘fast’ ISO (e.g. 1600) such as you might use at dusk, would be overwhelmed or ‘burnt out’ by so much light. Slow ISOs give minimal grain (for film) or noise (for digital). Generally, this is desirable. Shots taken in low light tend to be grainy or noisy–a trade-off for the ability to shoot when it’s so dark. ISO is the first thing I set on my camera when starting a shoot. Unless the light changes, I can forget about it and move on to aperture.
Using high ISO can cause digital noise in your images."Thingamagoop 2 from Bleep Labs" captured by Kevin Dooley on Flickr.
Using high ISO can cause digital noise in your images.”Thingamagoop 2 from Bleep Labs” by Kevin Dooley

APERTURE

Put crudely, the aperture is the size of the hole through which the light passes on the way to the sensor. It belongs in the lens rather than the camera body. Making the aperture larger allows in more light; making it smaller allows in less light. Aperture is measured in ‘f stops’ with slightly odd numbers attached. F/2.8 is a relatively wide aperture size. If we halve the size and therefore the amount of light, we talk about ‘going down a stop’ to f/4. If we go down another stop, we’re at f/5.6, etc. The higher the f-stop number, the smaller the diameter of the aperture. Aperture not only controls exposure (how bright/dark an image is) but determines depth of focus—one of the most creative tools available to the photographer. But more on that in a later tutorial.

SHUTTER SPEED

The shutter is like a door. Most of the time it’s closed, but every now and then, when we press the shutter button, it opens. The longer it stays open, the more light it lets in. Shutter speeds vary greatly–for portraits, 1/125 of a second is fairly normal. Aside from exposure, shutter speed is important in allowing the photographer to blur or freeze movement. Again, that will be discussed in a later tutorial.
fast shutter speed
photo by Ingrid Taylar

UNDERSTANDING STOPS

ISO, aperture, and shutter speeds all work on the principle of ‘stops’, a standard measure of light that is most easily tracked in half or double increments.
For ISO and shutter speed, this is fairly straightforward. ISO 400 (a good ISO for a heavily cloudy day) is a stop ‘faster’–or twice as light absorbent–as ISO 200.
A shutter speed of 1/250 is twice as fast 1/125 and therefore lets in half the amount of light.
For aperture, only the numbers are confusing–the principle remains the same. F/11 allows in half as much light as f/8 since it is one stop ‘smaller’.
If you take a shot that is too dark, you could try increasing the exposure (letting in more light) by a) opening up the aperture by a stop (say f/8 to f/5.6) or, b) slowing the shutter speed by one stop (e.g. from 1/500 to 1/250). This way you double the amount of light entering the camera. Either adjustment will result in the same exposure.
If all that has left you a little befuddled, fear not. In the next tutorial, I’ll take another look at exposure—this time how it can be applied in a more practical sense using the different camera modes (M, TV and AV).

Saturday, December 22, 2018

10 Mind-Blowing Photography Tips for Beginners

If you want to take better photos but aren’t sure where to start, this list of 10 beginner tips is for you.


1. PICK A SUBJECT THAT SPEAKS TO YOU.

Pay attention to the reccurring themes in your work. Think of what draws you to these things so you can find new ways to capture and express what you like!


2. PRACTICE!

Don’t be afraid to make mistakes! Sometimes those mistakes turn out to be something unique and innovative that you can build on.


3. WORK THE SUBJECT.

Try shooting the same thing in as many ways you can that capture different aspects about it.


shoot the same subject in many different ways

photo by Yu Morita


After your shoot, look through your shots and critique your work. Be mindful of what worked and what didn’t and why. Editing your shoot is an important part of the learning process.


4. STUDY THE WORK OF OTHER PHOTOGRAPHERS.

Find something that inspires you and pay attention to what you like and try to mimic it. Then try to make it your own by bringing in something new and different.


study the work of other photographers

photo by Street Photography Addict


5. COMPOSITION.

If you pay attention, you’ll see that most great photographs contain at least one of these guidelines:


Rule of Thirds. Imagine the image is divided into thirds both horizontally and vertically. The interesting aspects of the image are placed on those lines. This rule is often used in landscapes, with the horizon being placed in the top, or bottom third of the composition. Some cameras even have a grid option that will display through your viewfinder, to help you make your composition precise.

Balancing Elements. If you’re framing your main subject off center, try having a less important object in the background of the image to balance the weight of the dominant object. The secondary object will add depth to the subject and make it more interesting by filling the void of space in the image.

Leading Lines Use the subject’s lines or contours to your advantage. These lines lead the viewer’s eyes across the image, so become aware of them and how to use them to your advantage. The more they lead the eye around, the longer the viewer looks at your image. Examples of leading lines could be a winding road on a hilly landscape or the contours of your model’s body. Notice how models pose in ways that create leading lines by using their limbs in interesting ways.

leading lines

photo by Nicolas Raymond


Symmetry and Patterns. These are often used in architecture and nature, even in artistic portraits. The subject is center balanced, unlike in the rule of thirds.

Viewpoint. The angle from which the photographer shoots in relation to the subject. Showing us a subject from an angle that we don’t usually see it is a great way to make it more interesting. In working the subject, pay attention to the message the shot conveys. Try eye-level, from above, below, side, behind, from a distance, in close, etc.

Background. Pay attention to your background! If your background doesn’t add to the subject, use a plain backdrop or use a shallow depth of field to blur the background out. Think about how it affects the tone of the subject.

Depth. Mostly in landscapes, depth helps convey a three-dimensional subject in a photograph, which is two-dimensional.

Framing. Objects in your environment can be used to add to your shot! Some useful examples are archways from a building, branches from a tree, or holes in cliffs. These frames can help show off the setting.

framing composition

photo by Arches National Park


Cropping. Cropping in tight on a subject is a great way to remove distracting elements around it. Everything in the photograph should hold value to your image. If it doesn’t, try cropping it out.

The more you practice these composition guides, the more they will become instinctual. Even in your editing & selection process, pay attention to which images pop out at you, and see if they hold one of these elements.


6. FAMILIARIZE YOURSELF WITH YOUR TOOLS.

Photography is so versatile! You can even take amazing photos with a coffee can, but you must understand the limitations of your gear.


7. LEARN TO USE PHOTOGRAPHY SOFTWARE.

Digital software is today’s darkroom, and developing an image is just as important as how you shoot it. My favorite way to digitally polish my images is through Lightroom. It’s amazing what it allows you to do to an image without exposing yourself to chemicals or wasting photo paper and developer. The preset filters are a great way to intensify the tone of the image, but you must know how to fine-tune them to make the image just so. Photoshop is also an important tool.


8. LEARN LIGHTING.

I suggest photographing a subject at different times of day and compare them. If you have access to professional lighting equipment, try shooting your subject lit from different angles, diffusion versus hard lighting, etc. There are jobs just dedicated to lighting on high-end shoots, so there are no limits there if you have the budget. Really think about how the light conveys your message to the viewer.


studio lighting setup

photo by Matt Biddulph


9. GO WITH YOUR INSTINCTS.

Make sure what you are shooting is fulfilling something for you. There is no point in shooting something you aren’t enjoying. It will show in your work! The more you are passionate about it, the more creatively you can capture it! I’ve worked with so many photographers that have talent, but take on shoots they don’t enjoy and it showed in the quality of the images. For example, I could never understand why somebody would hire a nature photographer to shoot their portraits. Somebody that isn’t a people person doesn’t take flattering photos of people no matter how much technical knowledge they have. On the other hand, if you see all people as beautiful and you have a natural talent for making a person feel good about him/herself, then portrait photography is a great niche!


communicate with your subject

photo by Oscar Rethwill


10. COMMUNICATE WITH YOUR SUBJECT.

If you’re shooting any type of portrait, make sure it is prepared beforehand. There’s nothing worse than having your model show up with chipped blue nail polish! Learn to guide your subject with clear direction in a way that makes them feel comfortable! Even models feel vulnerable with a lens in their face, so learn to give suggestions in a flattering way. Nobody feels confident after hearing “suck in your gut,” but if that’s what you want, try something like “intensify your rib cage.” Compliments go a long way! When you ask for a smile, it will look forced. If you compliment the person they will naturally smile.

Saturday, December 1, 2018

Snow Photography: 4 Quick Tips

Winter is on its way with snow already falling across the country. There is nothing more serene than a fresh snowfall, but capturing a winter landscape full of white can be challenging to get right. Here are a few tips to help you ace those snowy shots.
winter cabin

1. EXPOSE TO THE RIGHT… A LOT

Snow means a lot of white, and white can trick the auto balance in your camera and lead to underexposed images. The metering system of your DSLR will try to expose white snow to middle gray. You want to overexpose your image to make sure white snow is, indeed, white. Be sure to constantly check and adjust your exposure.

2. KEEP YOUR PALETTE MINIMAL

Winter scenes are often meant to be calming and do not need too many colors or over editing. Stick with “winter colors” like whites, blues, and greens to keep your images simple. If you’re trying to evoke Christmas, then feel free to break out the red!
snowy landscape

3. SHOOT ANY TIME OF DAY

In the winter there is no need to limit yourself to shooting at sunset because the sun will stay much lower in the north and south and the days are often overcast. This makes a large majority of the day a viable option for photography.

4. CHECK YOUR METERING MODE

Metering is how your camera determines the correct shutter speed and aperture based on the amount of light that goes into the camera. Most DSLRs are automatically set in matrix metering or evaluative metering mode, which divides the camera into zones to determine the correct exposure. In the snow, you don’t want to leave your camera in this mode because it will average the image and expose for grey. Instead, try spot metering the brightest part of the snow.

Monday, January 15, 2018

Civil Rights Photographer Ernest Withers

I met civil rights photographer Ernest Withers in 2005. Withers traveled with Martin Luther King and documented the civil rights movement during the early 60's and was influential in bringing the civil rights movement from the deep South to the national stage. Portrait shot on location with a Nikon D700/50mm lens and available light.

Wikipedia - Dr. Ernest C. Withers (August 7, 1922 – October 15, 2007) was an American photojournalist. He is best known for capturing over 60 years of African American history in the segregated South, with iconic images of the Montgomery Bus Boycott, Emmett Till, Sanitation Worker's Strike, Negro league baseball, and musicians including those related to Memphis blues and Memphis soul.

Thursday, October 5, 2017

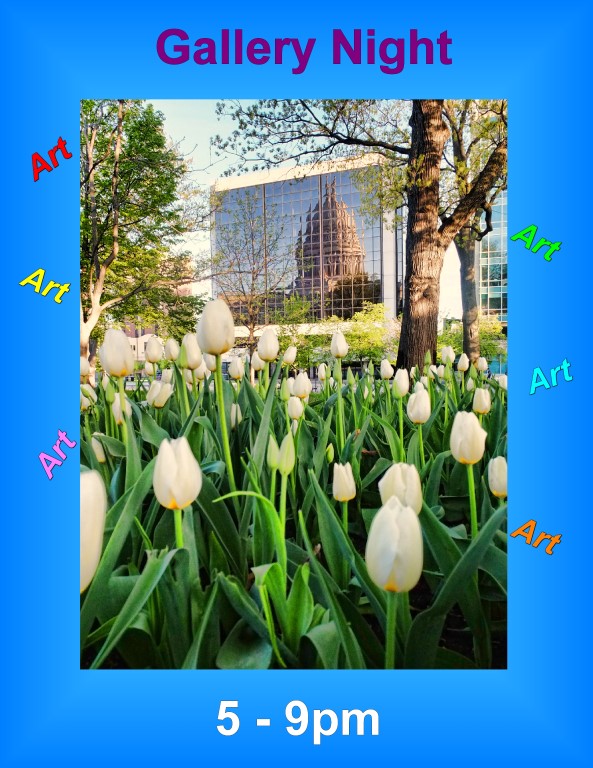
Gallery Night Friday Oct 6th from 5pm until 9pm. Talbot Studio and Gallery, 2118 Atwood Ave, Madison WI ...


Saturday, September 30, 2017


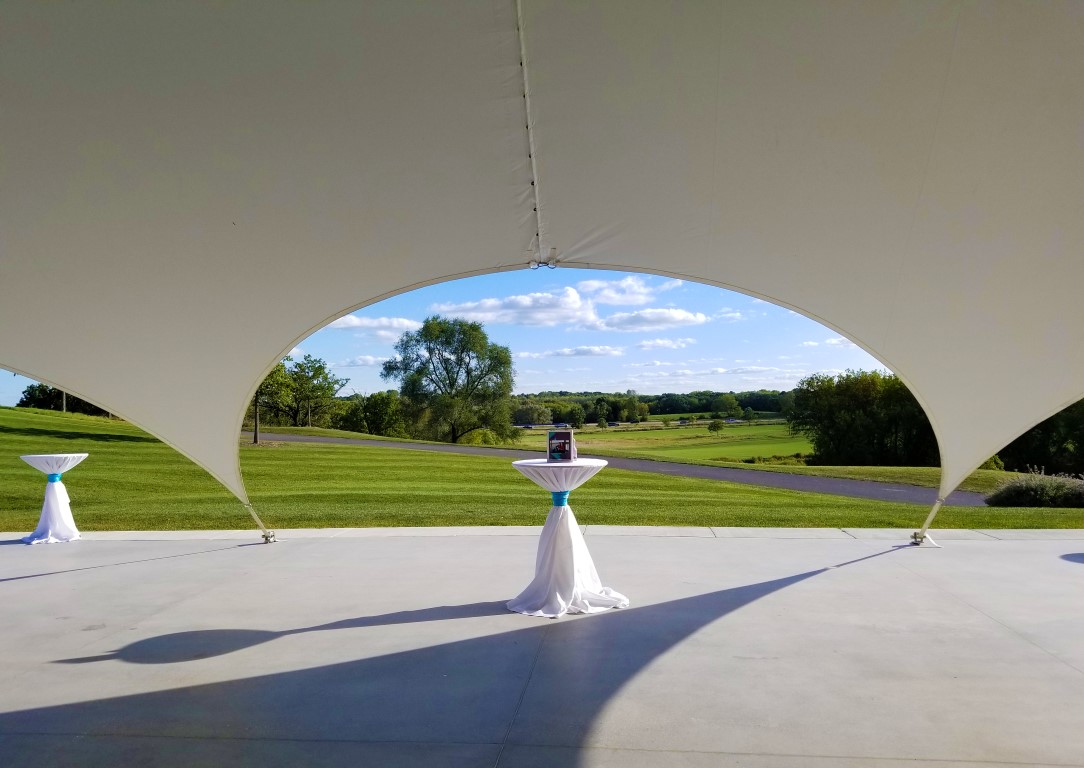
View from the wedding tent yesterday. I started shooting weddings and portraits 40 years ago to temporarily support myself as an art photographer and musician. Well, I'm still at it, and what a run it's been - over 1200 weddings under my belt (maybe that's why my waistband has expanded). I'll probably retire in a year or two, but in the meantime it sure has been fun!

Tuesday, September 19, 2017


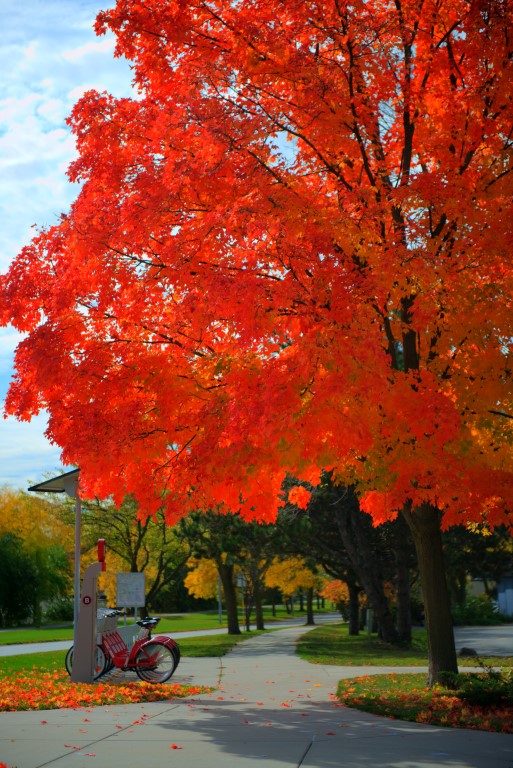
This beautiful Maple tree is located across the street from Talbot Studio and Gallery, 2118 Atwood Ave. Every year folks travel from all around town to view it's beautiful Fall colors. The tree was planted years ago by Bob Hanson, the owner of Mr Roberts Bar and Grill, in memory of his father. photo by Terry Talbot/Talbot Studio and Gallery ...